
Commercial Photography on a Budget! (Under $10!)

Not Sponsored by Wet n Wild.
This picture only cost me $5!
That's right! Photography doesn't have to be expensive! So, here is how you can get some clean product photos for your catalog or portfolio!
Here is what you will need! Most of these items were purchased at Dollar Tree. This is also assuming you already have a camera and light source.
Display Board: This will act as the background. White is typically a good color that can easily be edited, however black is a great alternative. Feel free to get creative with it though, if you want to have a unique look.
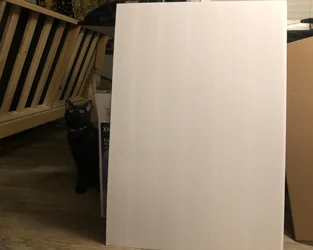
Foam Board (one or two) This will act as a light diffuser or reflector. Side note: If you do not already have a reflector, this can also be wrapped in aluminum foil! (Cat optional.)

Black Plexiglass (about $10 on Amazon) or A photo frame! Really, you just need a reflective surface that you can lay something black under. You should be able to lay it flat. The bigger the better. However, for smaller products (such as cosmetics) an 8 x 10 frame will be plenty of space.

Black craft foam or piece of paper. This will go under the glass if you are using the frame instead of Plexiglass. (If using plexiglass this is optional.)

Flat surface such as a table, in this case I used a stool. (Although, a table would probably have been smarter.)

Product you will be photographing. For this example, I am using a Wet n Wild lipstick from the dollar store.
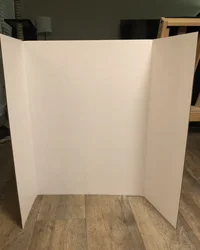
The Set-up
Once you have all of your items gathered, you're going to set it up like the image below. You may want to set yours up on a table instead, but I didn't have any available, so I went with what I had. You will want to place your product with several inches of space between it and the display board, this will minimize shadows. You may also want to set your camera on a tripod, level with your product. However, this is optional depending on the look you want. My tripod was in my car and I didn’t want to go outside and get it, so I just set my camera on the foam board that was acting as my table. Not pictured: the plexiglass or photo frame would sit under the product, which creates a reflection of your product, giving the image some depth.
For my light source, I decided to use a speed light attached to my camera. The light is angled so it points up towards the reflector. (If you don't have a reflector, you would use one of the foam boards.)
My shutter speed on my camera was 1/160, and then I played with the f. stop to get different lighting results. my favorites were around f3.6. However, getting multiple shots of your product at different f.stops is useful if you are interested in doing a focus stacked image. I used a Sigma 30mm f/2.8 lens.
(Author’s note 4/7/2020: When I wrote this article originally, it was before I had learned the difference between f stops and how to really use a speed light/flash. For those that are unaware, f stops are related to depth of field focus. The smaller the f stop, the less the product will be in focus. The higher it is, the more that will be in focus. Playing around with different f stops though can give interesting looks to your image.)
Also, if you do not have a speed light or something similar, I found that the flash on the camera itself actually worked fairly well with this set-up. However, constant overhead light is fine if you have absolutely none of these things. Just be conscious of any shadows your product may be casting. Another alternative would be to look into light painting the subject.

The set-up.
Final Image results (After Minor Editing)
Here are some of the results from the shoot. Remember, the point of catalog photography is to capture the product as closely as possible, while making it look appealing. So if you do edit the images in post production, remember to keep it very basic: cropping and subtle contrast or brightness adjustments. Try to do as much as you can during the shooting process, so that you can save time during the post production. For example, remember to have your white balance set accordingly so that the hue of your final image isn't too warm or too cool. If necessary, use a gray card.
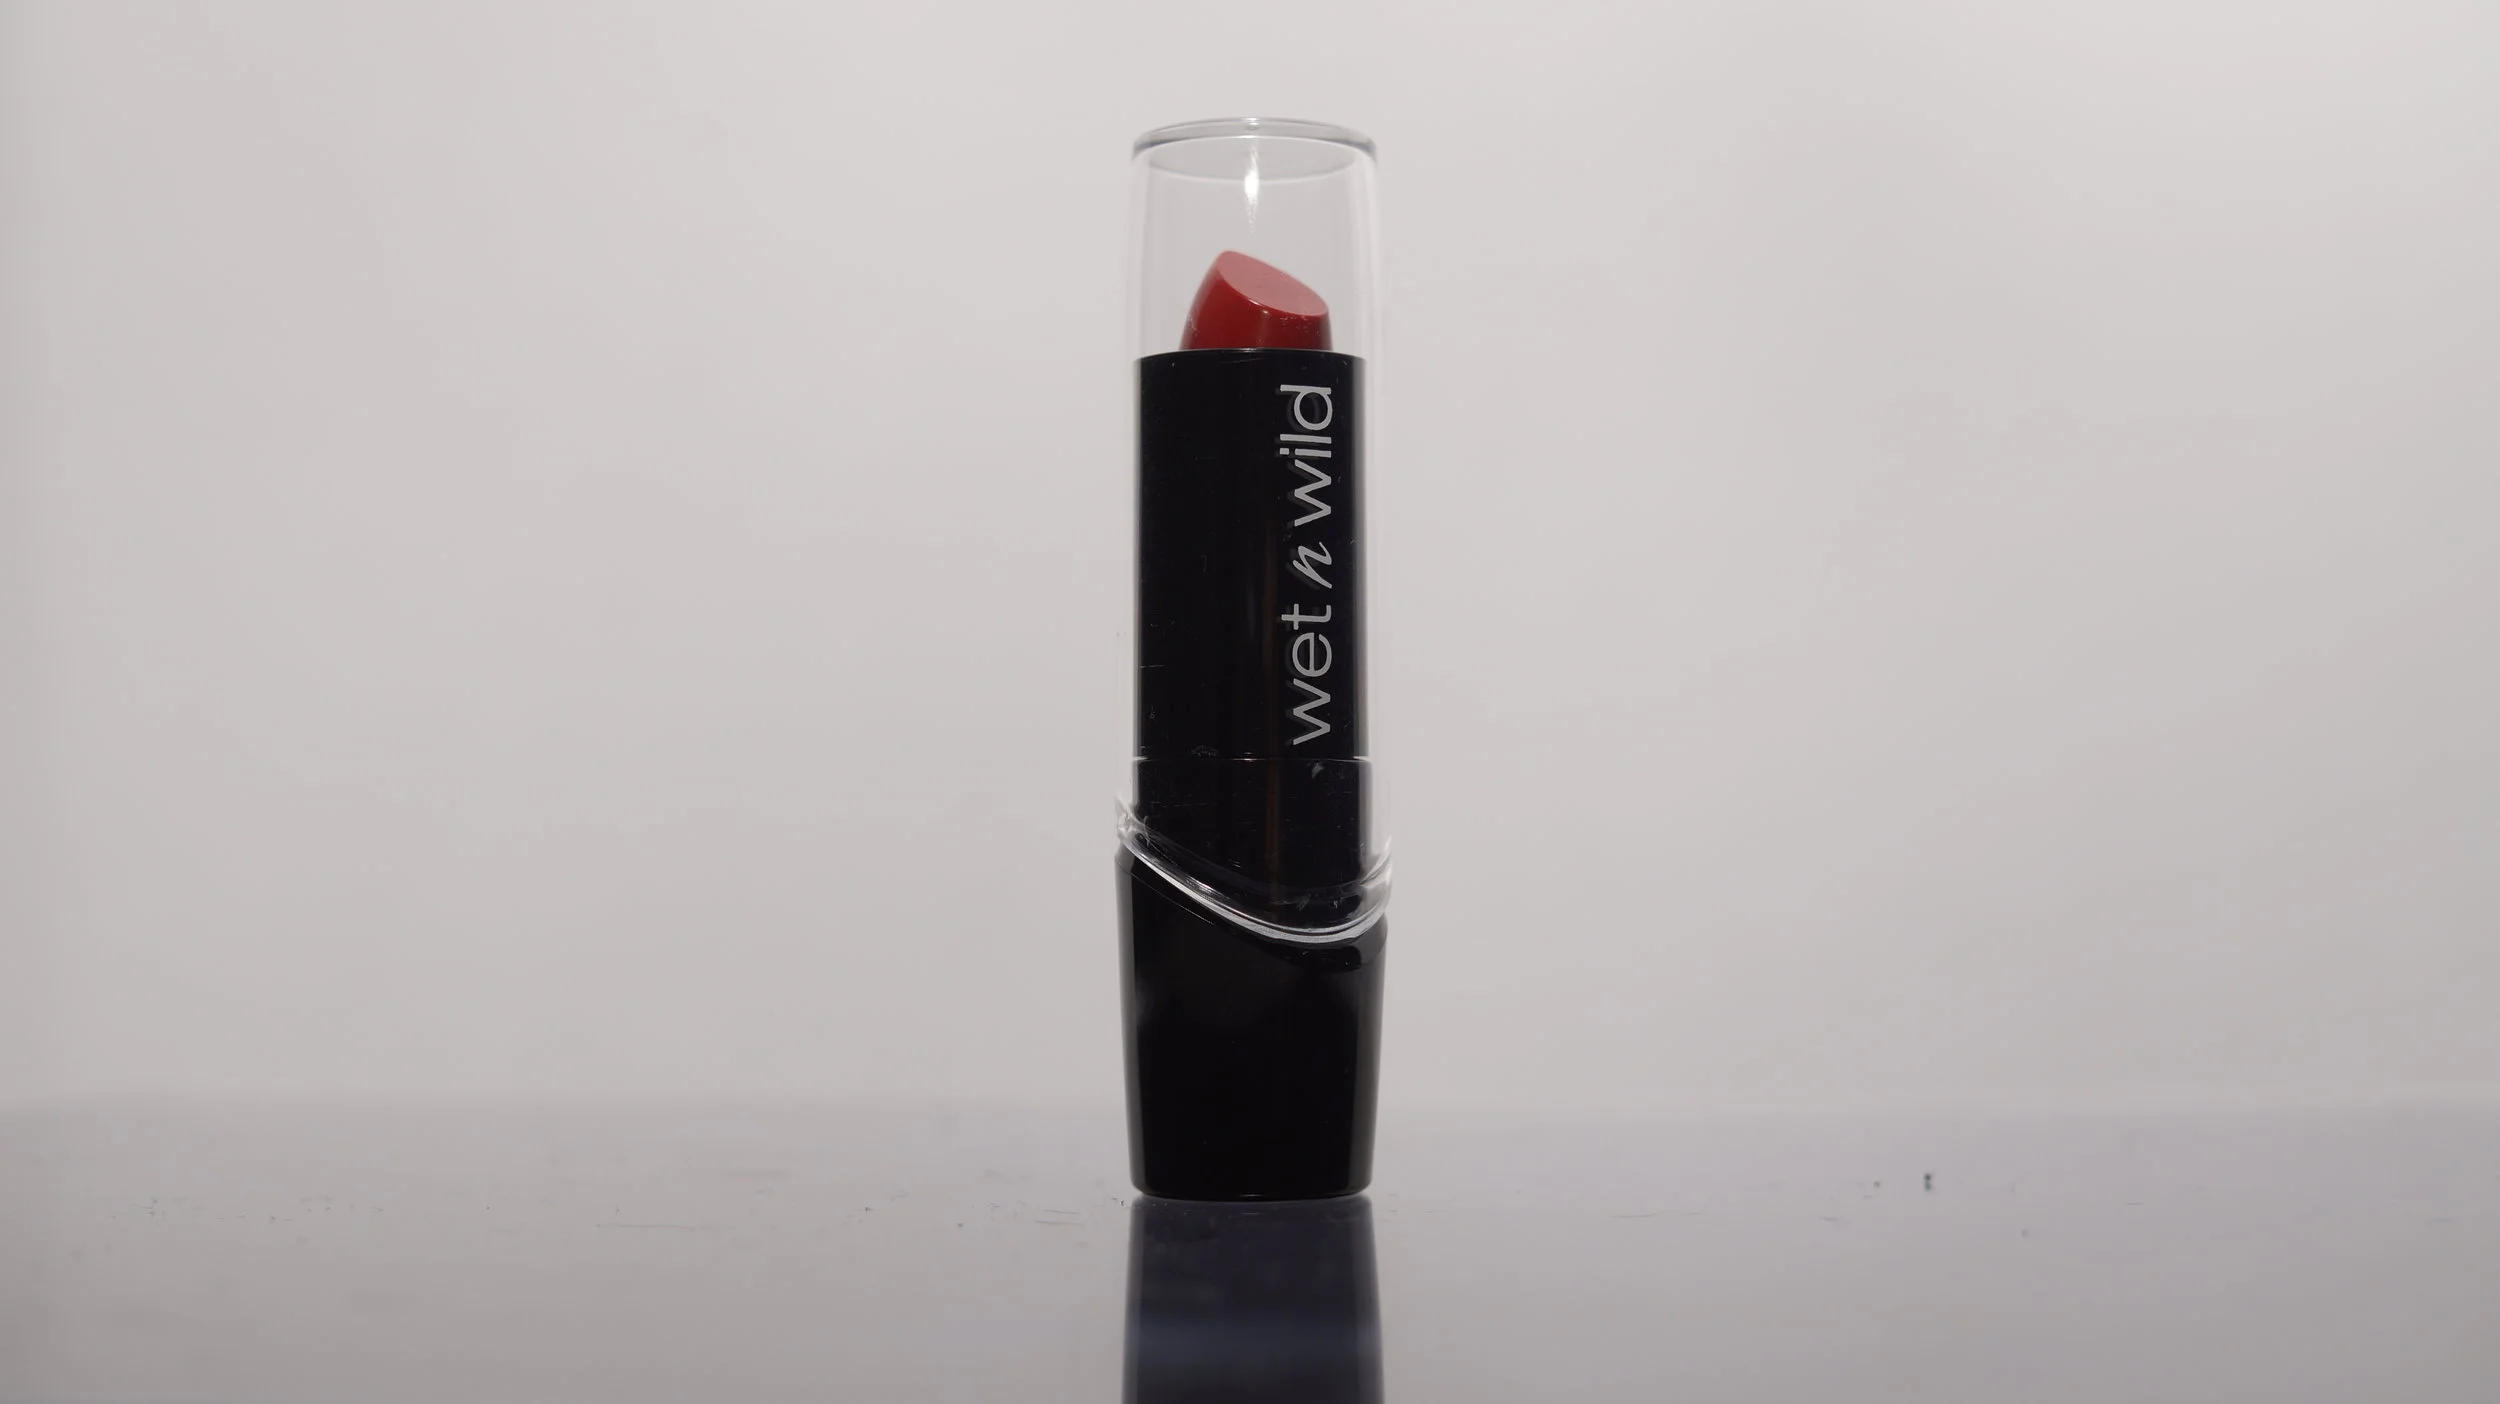
Before, straight from camera.

After some minor editing. By adjusting the brightness and contrast slightly, the line where the glass meets the background fades making it seem almost seamless. Cropping can also bring the focus in more towards the subject.

Custom jewelry piece I made.
There you have it, the cheapest way that I have found to create beautiful, clean catalog images. If you have any questions, feel free to leave a comment with them or send me an email or a direct message on Instagram. (My photography based one is @sparrowmoosemedia.)
If you do use this method, feel free to tag me on Instagram so I can see your work!
If you enjoyed this tutorial, feel free to leave a comment about what you'd like to read about in the future!
Thank you for reading!
Sparrow Moose